A Budget Mikado

The answer was to make a reasonable model out of a readily available plastic engine. I remembered that Athearn Genesis made a USRA light 2-8-2 with a high headlight resembling the look of the Burlington’s mikes. A few detail changes would result in a “good enough” O-1A. I found an undecorated version at a train show to use as a starting point.

The Genesis mikados have a unique design. The engine picks up power only from the drive wheels. A “tail” containing the DCC socket hangs off the rear of the cab and sits inside a cavity in the tender. There are no electrical connections to the tender at all. The DCC socket (and attached decoder) can slide in and out of the cavity when the engine is separated from the tender. Despite the limited pickup, the engine ran well over switches and seemed to be a good base for a project such as this.
Nearly all of the O-1As had feed water heaters. I decided to install an Elesco type to make the front end look more “Burlington”. I found the detail piece on EBay and made the piping from brass wire I had on hand. The heater unit is sunk into the top of the smokebox. I used a round file to make the carved-out section, using prototype photos to approximate the depth. Once I was satisfied, I glued the heater in place and bent the wires to match the water pipes of the prototype. I didn’t complete all the piping. Instead I tucked the ends behind the running boards to imply that additional piping was present behind the other details.

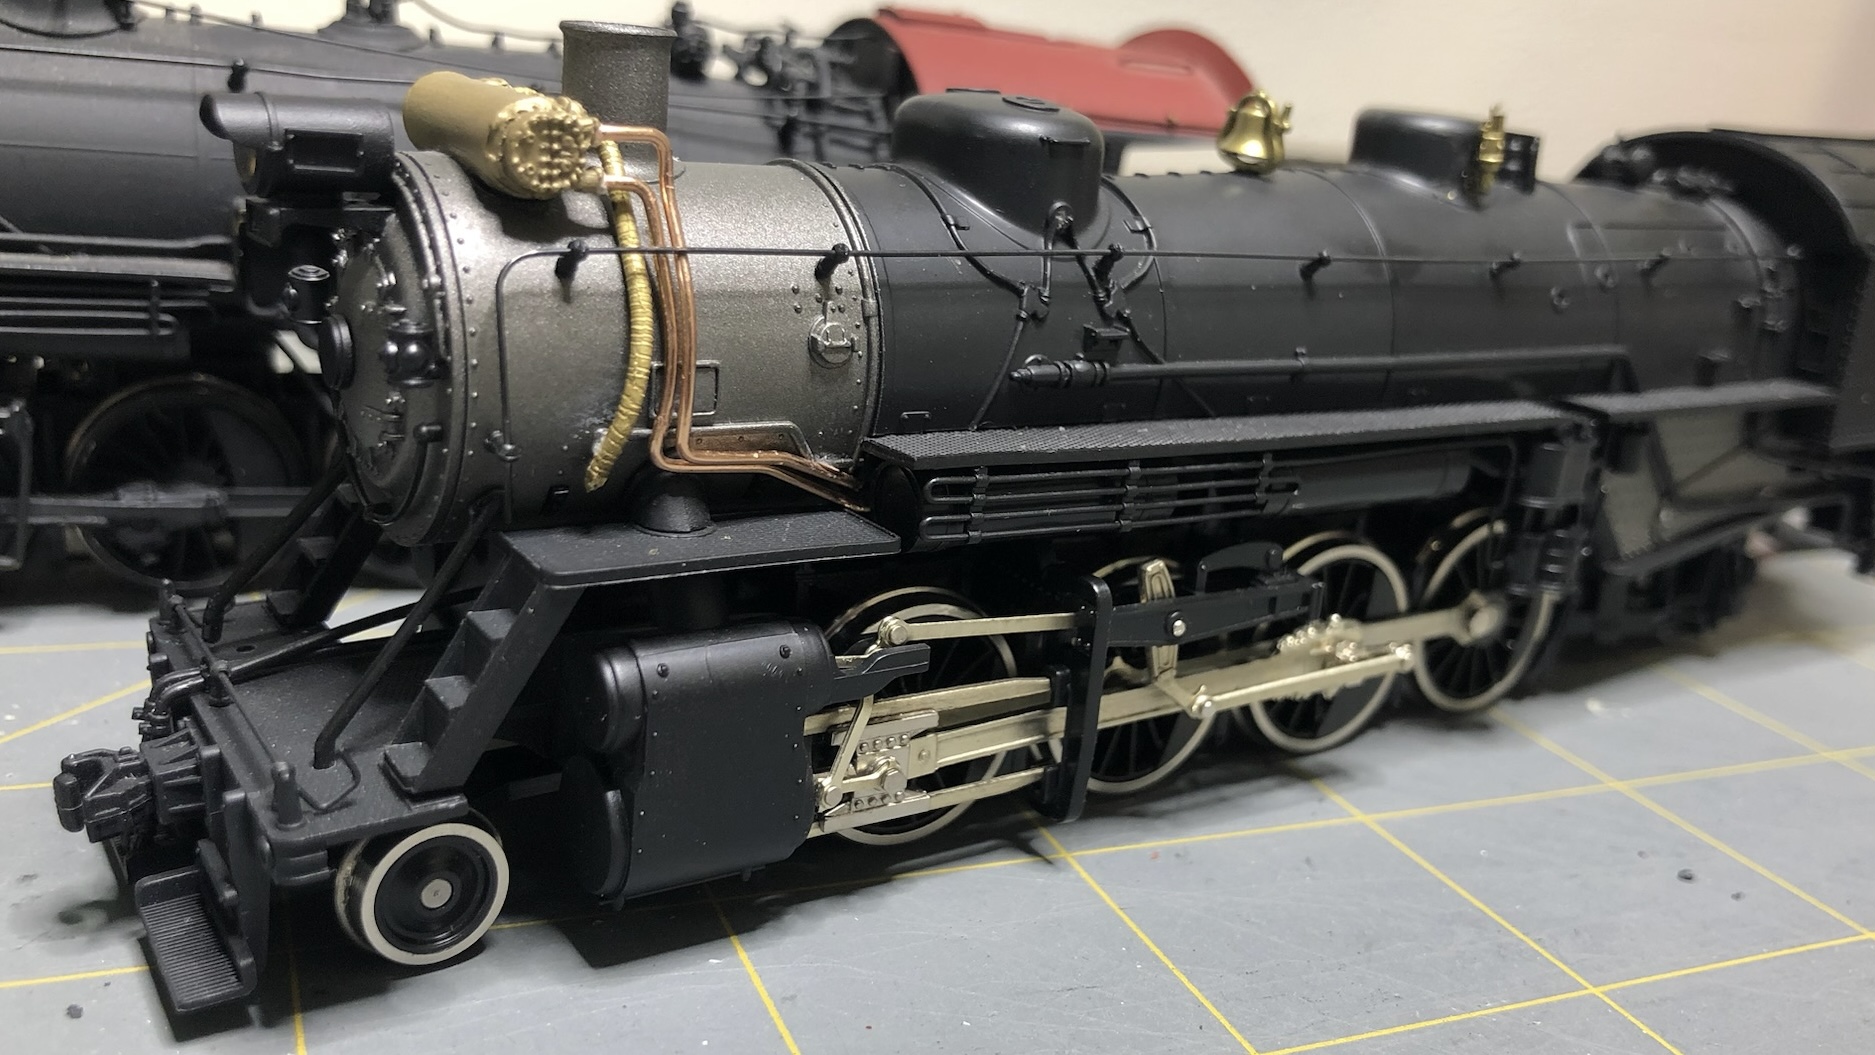
The rest of the project was purely paint. I painted all the wheel faces flat black. Covering the shiny metal tires goes a long way to enhancing the look of a steam engine. The cab roof was painted oxide red, matching Burlington practice. I used Microscale decals to letter the engine as CB&Q 5067.


I kept DCC installation simple by using a non-sound decoder that plugged directly into the 9-pin socket on the end of the wire “tail” hanging off the back of the engine. Despite some noticeable differences between this kitbashed model and a CB&Q O-1A, the engine looks surprisingly good on the point of a freight.


Comments
Post a Comment