Lumber St. Industrial District Part 2

This post is part of a running series on my home layout progress.
I decided to continue work on the Lumber St. industrial area by adding roads and smaller buildings near the two anchor factories covered in my last progress update. I wanted a small commercial area along the street separating the two big factories to capture the feel of the mixed-use neighborhoods typical of mid 20th century cities.
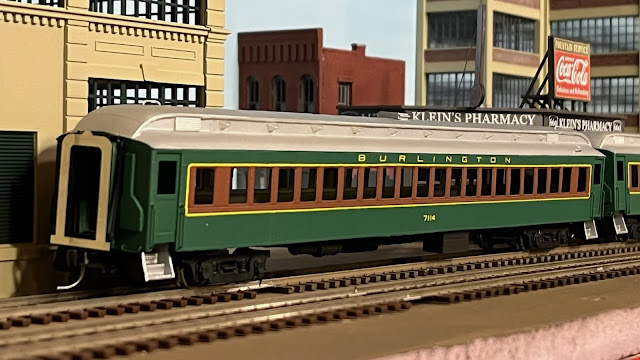
The focus of the commercial scene would be Klein’s Pharmacy, a kit by JL Innovative Design. I liked the unique look of the building, and it fit perfectly into the corner lot I envisioned for the scene. The kit is a mix of materials. The walls are mostly laser-cut wood parts. The front entrance is a molded plastic section. Numerous white metal detail parts and printed signs are included. These really bring the building to life.
The kit went together fairly easily. I generally followed the kit instructions, painting and detailing each wall before assembling the final structure. I added a selection of signs to the windows, giving the building a lived-in look while simultaneously disguising the empty interior. I recorded the construction process on my YouTube channel.


With Klein’s pharmacy completed, I was able to finalize the positions of the streets and factories on central Lumber St. Much of the track around the industrial district was embedded in the pavement, so I needed a flexible way to model this without impeding the reliability of the track work. Plaster seemed too messy and styrene too smooth and flat-looking. As an aside, I’ve seen great streets built with these materials, but I decided to try something different.
I found a technique on YouTube that uses art illustration board for streets and sidewalks. It is a thick cardstock material available at most art supply stores. I liked it because it can be cut and scored with a hobby knife, allowing me to make fine adjustments while fitting the board around track sections. It also takes paint well, and seams can be hidden using gesso. The thickness of my boards was just about perfect for street trackage. When laying the board flat on the ties, the top of my code 83 rail was just above the surface. No shimming or sanding needed!


I carefully cut my streets out of the boards, using large sections to avoid seams where I could. I used a second layer stacked on top of the first to make curbs and sidewalks. My buildings were also raised to sit level with the sidewalks. I used inexpensive craft paint, mixing light and dark gray to get a shade that looked right for asphalt.
I experimented with modeling a brick side street by scoring a brick pattern in the illustration board using an Exacto knife. I painted this with a reddish clay color and weathered with chalk. The process was rather labor intensive and the resulting pattern not perfectly to scale, but I loved the result. I'll try more brick streets as long as my wrists hold up.
Once the streets were painted, I laid small strips of plasticine (non-hardening) modeling clay in the flangeways of the embedded track and tamped them down with a toothpick. This disguised the oversized flangeways that are necessary for reliable operation. I found a clay set that included brown and gray earth-toned colors that blended in well with the rest of the scenery.

With the roads around the factories completed, I moved onto ballasting track. On my layout, Lumber St. is part of both a through-route for transfers to/from staging, and is a stand-alone switching area. I wanted to capture the look of a gritty, well-used line that didn't see a lot of maintenance. The main track is ballasted with a 50/50 mix of gravel and dirt. The sidings use mostly cinder ballast or a mix of cinders and dirt.
I applied the ballast in short (roughly 12in) track sections. I worked in layers, usually laying and gluing the gravel or cinders first. Then I added the ground foam dirt and leaf-litter to create muddy spots in the ballast. The underlayer of gravel or cinders helped to keep the fine ground foam in place as I glued it down. A final layer of green foam and selectively applied static grass created weedy spots between the track.
.jpg)


Currently, I am slowly working eastbound along the line and will soon reach the end of what I can ballast before tackling the next major industry anchoring the east end of Lumber St. More on that in the next update.

Comments
Post a Comment