CB&Q FT-F2 Set Part 1

Like many railroads, the CB&Q’s first road freight diesel was the EMD FT. They received 16 4-unit FT locomotives in 1943-44. The A-B-B-A sets were semi-permanently coupled and were considered single 5,400hp locomotives. In the immediate postwar years, 5 of the FT sets were broken up and paired with 10 F2 cab units built in 1946 to create 4050hp 3-unit F2A - FTB - FTA locomotives.
The Burlington operated a large fleet of F units during the years I model, so I couldn’t resist having one of these uniquely Q sets on my layout. While models of the later F unit versions are plentiful, FT’s have only been made in plastic by Bachmann, Intermountain, and Stewart. (As of this writing, Rapido has also announced FTs.) The Bachmann FT is inaccurate as it uses the same chassis as a later-model F-unit and is too long as a result. The Intermountain offering would have been my first choice from a detail perspective, but they are out of production and very hard to find on the secondary market. Stewart FTs are dimensionally accurate but are sparse on detail. However, they are plentiful on the secondary market and I found a CB&Q A-B set to use as a base for this project.
Photos from the late 1940’s showed these units were equipped with radios and had nose grab irons installed. I also wanted to bring the level of detail of the Stewart shells up to modern standards. Fortunately, several manufacturers have produced add-on details for Stewart F-units. A search on EBay netted me the parts I needed.
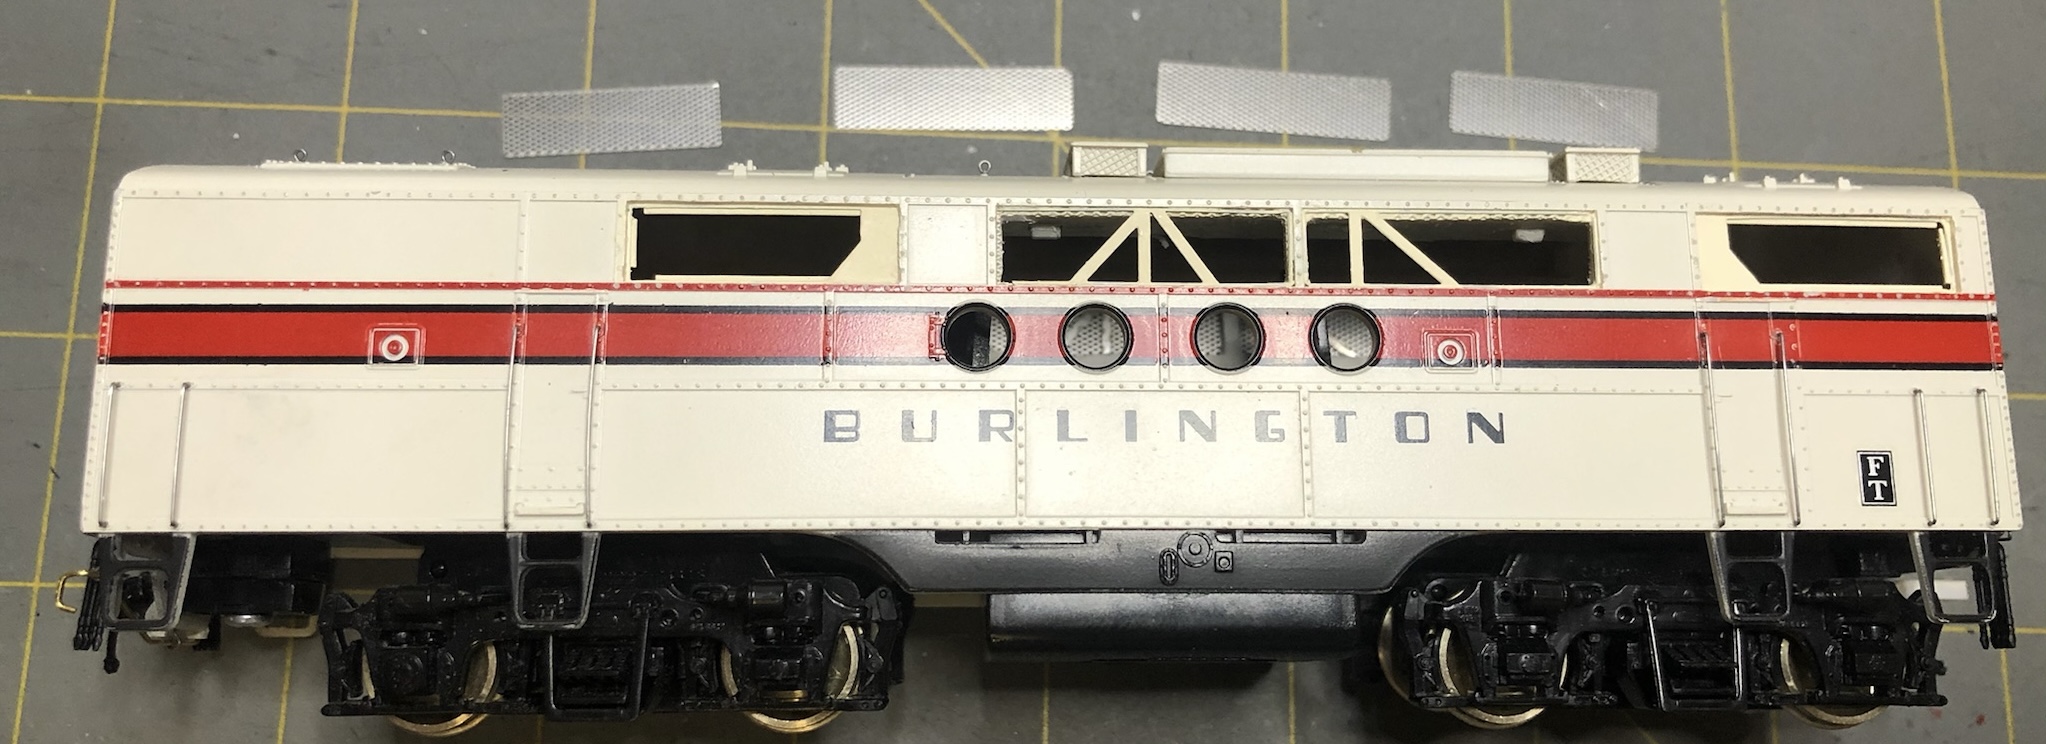

I started by installing etched-metal screens on the air intakes of both the A and B units. This required cutting out the molded plastic intakes and glueing an insert that represented the distinctive exposed truss members on FTs. The etched metal screen was installed on top of that and painted. Both units also received air hoses, MU hoses, handrails, roof lift rings, and working diaphragms.

Additionally, the A unit received grab irons and a footstep along the fireman’s side of the nose. I eyed the placement of the grab irons from photos and made sure to evenly space them apart. The Burlington began installing radios in some of their diesels during the 1940s. Photos show the FT-F2 sets with firecracker antennas on the cab roof with an external electrical conduit running up between the windshields. I found brass antenna detail parts and bent a brass wire to form the conduit. Lastly, I installed a speed recorder on the lead axle of the fireman’s side.
The Stewart mechanism is smooth and quiet. I only had to wire up the Tsunami2 decoder and install a small sugar cube speaker. I kept the existing Stewart light board for the marker lights and wired them through resistors to the decoder.


I left the Stewart factory paint intact, but needed to touch up the added detail parts. The off-white/light gray color of the Q’s F-units was difficult to match. I started with a bottle of Polyscale SCL Hopper Car Beige, but found it too warm in tone. I added drops of a light gray primer color to cool it down. I tested the color on a piece of scrap styrene after each drop until the color shifted closer to the Stewart paint. The CB&Q blanked-out the 2nd porthole on the fireman’s side of their FTs and installed a louvered panel in its place. To replicate this, I simply painted over the existing window and scored “louvers” using an Exacto knife.

My FTs were unnumbered, so I added road numbers and builder’s plate decals to complete the model.
The F2 portion of the set will be covered in a future post.


Comments
Post a Comment