Lumber St. Industrial District Part 1

The area around the Chicago River just south of CUS was home to a wide variety of industries, ranging from grocers and grain elevators to foundries and asphalt plants to lumber yards and glass manufacturers. A spiderweb of spurs served these businesses from a street-running branch that extended from the PRR/B&OCT/CB&Q rail corridor along Western Ave. eastward along Cermak Rd. and Lumber St. to a connection with the PRR mainline south of CUS. Another connection to the branch extended south from Burlington’s Western Avenue Yard and joined the branch at Cermak and Canalport. As recently as 2010, some of the track along Cermak road was still active, but it has since been abandoned.
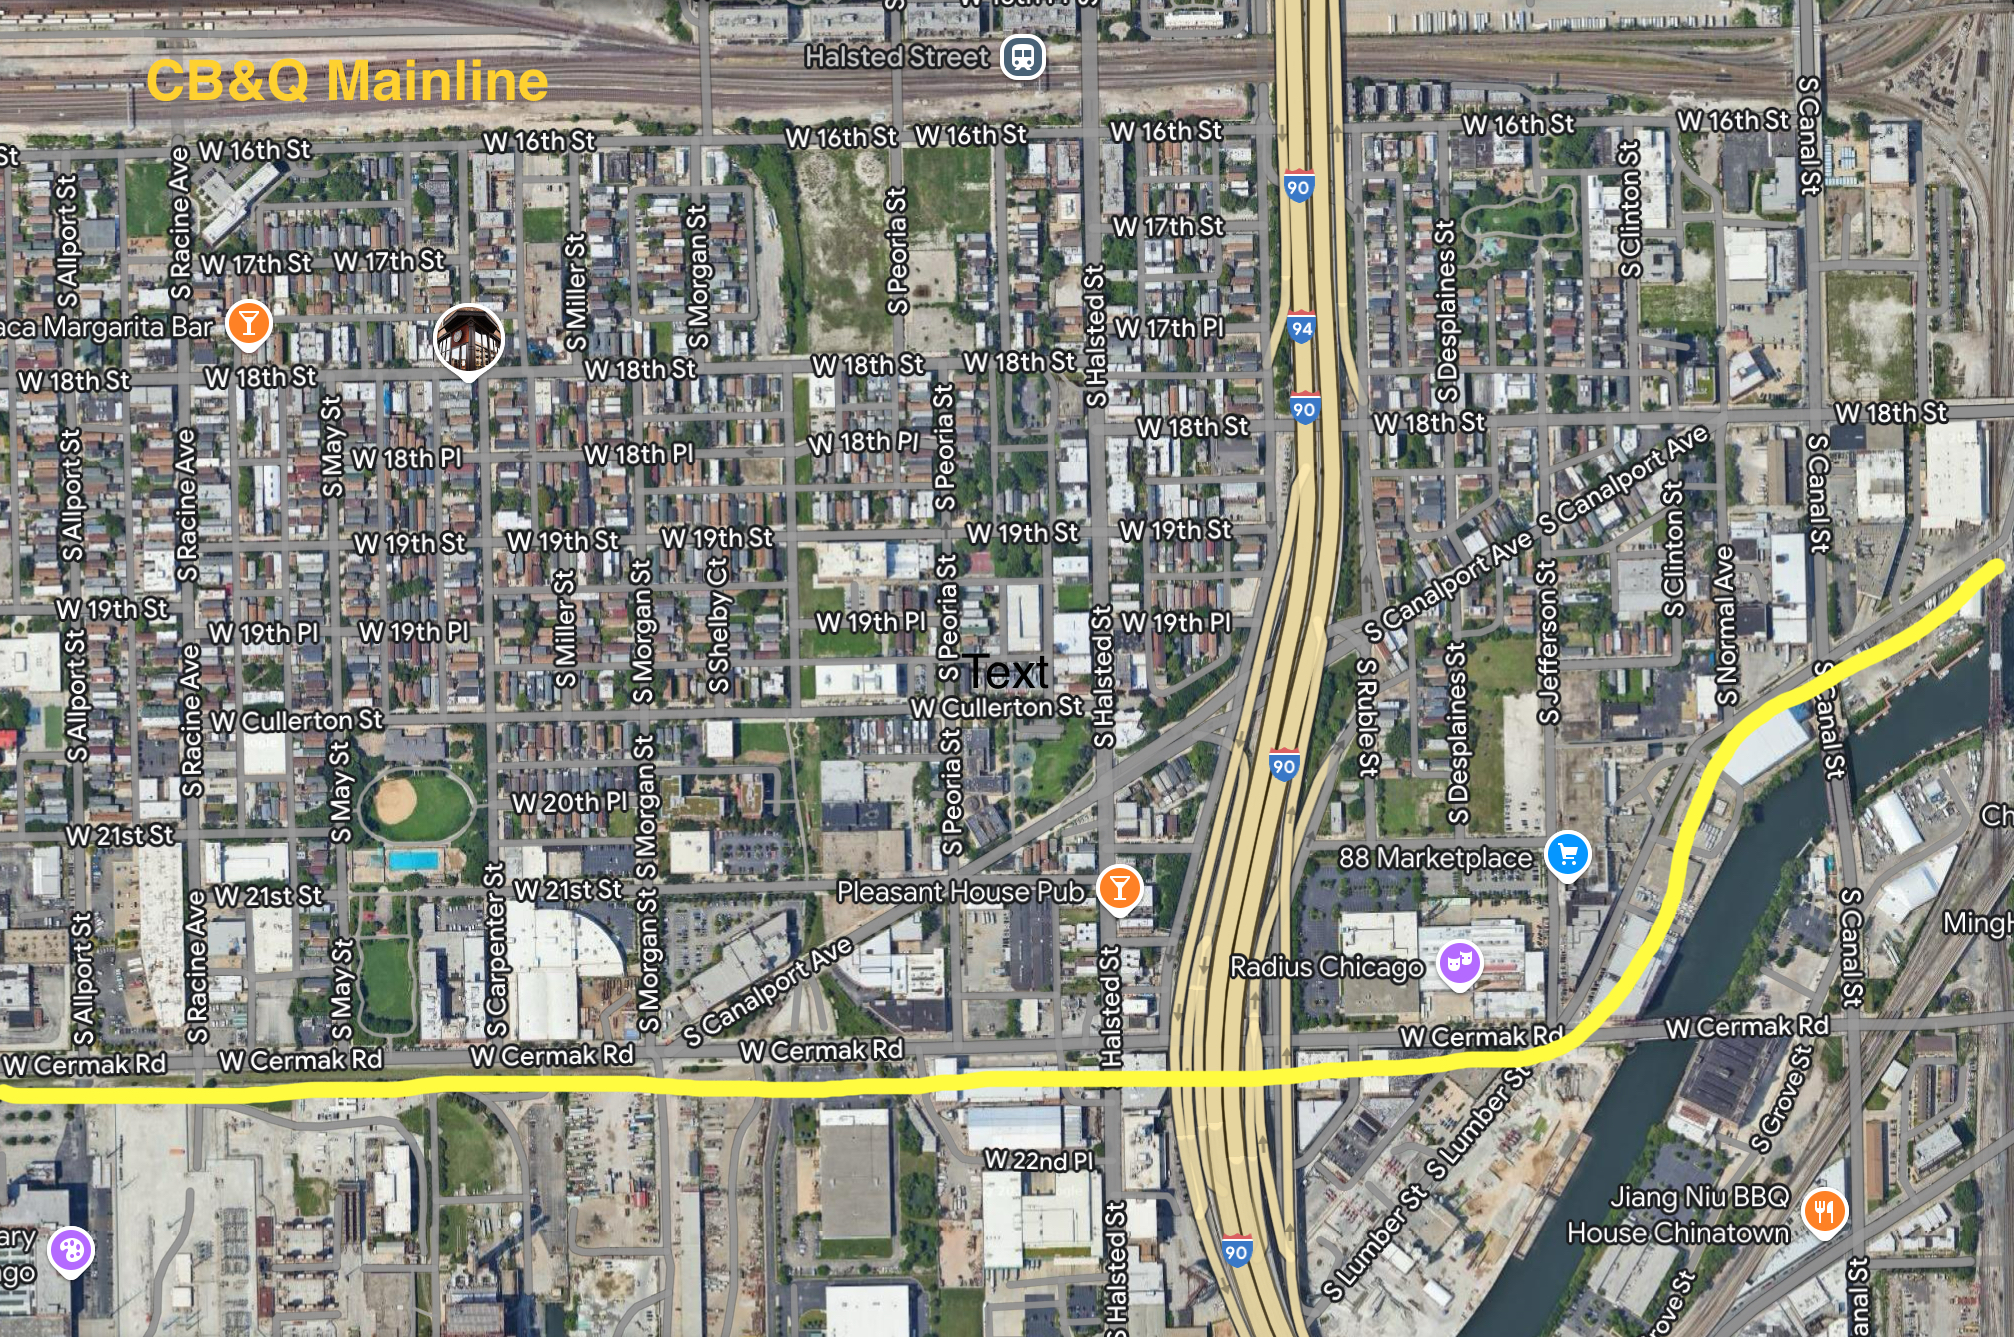
The modern satellite view above shows the corridor highlighted in yellow. I worked from historic Sanborn maps of the area to get a general idea of the businesses and track arrangement. A “faithful” depiction of the entire district would take up the entire room, so I tried to focus on a few anchor factories and representing the densely populated city around them. Knowing that I wanted to run this portion of the layout independently as I completed the rest, I made sure to include a runaround track and enough space to access each spur in the track plan. In my version, the branch also serves as a corridor for transfer runs interchanging with the Burlington. I included a passing siding to allow them to get around the local freights.

Lumber St. occupies a shelf along the rear wall of my layout room, and I decided to make it the first portion of the layout to be constructed. I attached shelf brackets to a 16ft portion of the wall for both the main and lower levels. Western Avenue Yard will eventually occupy the upper level. I wanted to complete the industrial area to a point that I could run trains while finishing the room and building the rest of the layout.

I finalized the track arrangement by temporarily standing up pieces of the factory kits that I planned to use and planning the spurs around them. I laid and wired the “main” using code 83 MicroEngineering flex track. Turnouts are ME #5s or Walthers #4. I didn’t glue down the industry spurs until after I assembled each building and confirmed their footprints.
The first large factory started out as 2 Walthers Hardwood Furniture kits plus a Background kit in the same style. I cut and spliced the wall sections to create a tall main building and shorter annex with a covered loading dock extending along the track. My intention was to imply that the factory extended back into the backdrop.


I used the building’s columns and architectural details as guides when cutting or extending wall sections. This helped to hide the seams where pieces were spliced together. After gluing the parts together, I spray painted the assembly a concrete color. I separately sprayed the windows and doors dark green before glueing them to the walls. Some of the windows were bricked up using styrene brick-pattern sheet.
The second factory was kitbashed out of 2 City Classics Smallman St. Warehouse kits plus one of their two-story extension kits to create a large 5-story structure. Again, the building was designed as a flat to sit against the backdrop. The kit is wonderfully generic and ripe for customization and detailing. I cut and reassembled some of the wall parts to get the door arrangement I wanted, using natural seams and architectural breaks to hide the splices.


I painted the building concrete-gray from a spray can and brush painted the brick panels afterwards. The windows were sprayed light gray while still on the sprue and glued on after the main structure’s painting was completed.
I decided this factory would include its own boiler house for power. I harvested the end wall from a power plant structure I found at a swap meet and turned it into a low-relief flat. I added a short spur alongside for delivering coal.
The completed factory buildings really anchor this section of the layout. I’ll next work on adding details and on filling in smaller buildings around them.


Comments
Post a Comment